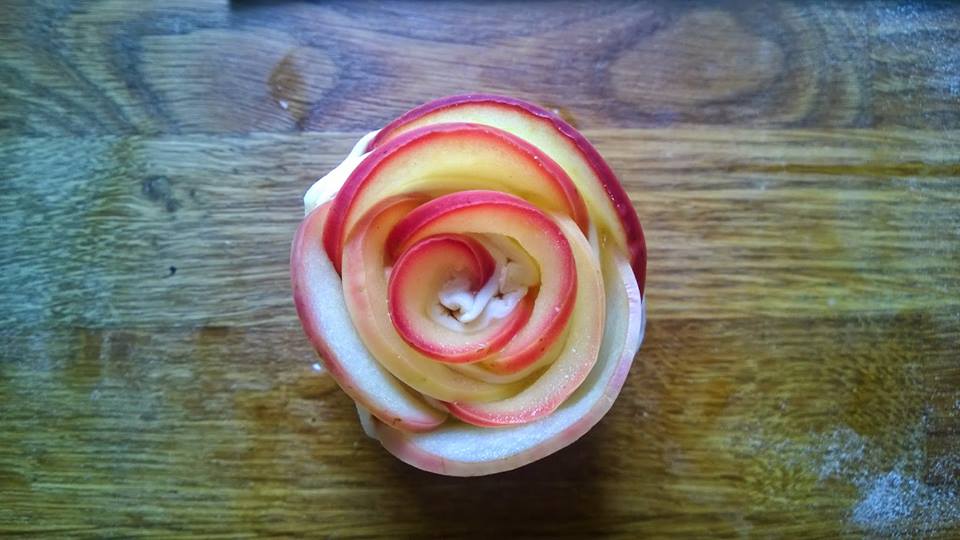
My original blog is going strong, but I kind of neglected its English brother :( School starting for the first time for my older son really took a toll on our schedule and at the end of the day, if I found any time for my blog, the original was my priority. Now with the things finally settling down a bit, we have adjusted to all te new things and I hope to have at least a bit more time to work on this site as well. Remember my witchcraft from a few months ago? The magic vanilla squares are one of the more popular posts on my blog, so I wondered ... how do you make a recipe better? Of course, with chocolate :) Let's try!

For a 25 cm x 15 cm tray:
3 eggs
110 g granulated sugar
1 vanilla bean
100 g butter
90 g flour
35 g (bitter) cocoa
375 ml milk

Separate the eggs and whisk the egg whites into a meringue. Beat room temperature butter with the sugar and the vanilla so you get kind of a nice buttercream. This technique seemed to work better for me instead of melting the butter like in the vanilla recipe.


Add the egg yolks to the buttercream and whisk so that the mixture lightens to a light yellow colour and increases in size. Add flour and cocoa or even better sift it, if you see that it has lumps in it, which tends to happen with my preferred cocoa brand. Mix thoroughly, then add 1 quarter of the milk. Mix again and add another quarter of the milk. Repeat until all the milk is mixed into the batter. The batter will be quite runny, like pancake batter. But not the american kind, I mean like our kind, so I should say it should be like a more runny crepes batter. 

Add the meringues and gently mix, but mix it well. It is OK to if there a few smaller meringue pieces left, but otherwise the meringue should be well incorporated into the batter. You'll find this may be quite tricky, but its what makes magic later.


Pour the batter into a greased pan and bake at 160° C for approx 30 - 40 minutes. Around that time mark just carefully try to jiggle the pan and if the batter is still kind of jiggly, add another 10 minutes to the baking time.

Once baked, take the pan out of the oven and let the cake cool to room temperature. Once cooled, place it in the fridge for at least another hour.


Cut the cake into squares and carefully put them on a plate. If your bake was a success, you will see 3 distinct layers, each completely different. One really soft, one custard like and one like a fudge.


And the verdict? Don't get me wrong, this is delicious, but at the same time, it is also one of those rare instances, where I prefer the original vanilla recipe. So this time ... chocolate vs vanilla = 0 : 1.


It's my baby's birthday! I really would not be me, if I didn't take advantage of the fact that he has not yet reached that stage where he starts getting weird or elaborate ideas of what kind of cake he wants for his special day. I have no doubt that next year will be different. So his star sign is right in the between leo and virgo, but if you knew him, he is definitely a leo. So why not make a lion cake for my little lion?

I quickly typed "lion cake" into Pinterest, but I really didn't get any "wow" ideas with the exception of this cake, which is totally insane. But the thing is that as much as I love working with fondant, because it is a great medium for this kind of masterpieces, no one in my family really likes it (does anyone like it?!), so I try to challenge myself and create cakes without fondant. How about chocolate?

So, step one - three types of ganache! Dark chocolate ganache (use ratio of 2 : 1 for chocolate : cream), milk chocolate ganache (ratio of 2,5 - 3 : 1 for chocolate : cream) and white chocolate ganache (ratio of 3 : 1 for chocolate : cream). Ganache will need some time to cool and thicken, especially in the summer temperatures, so in the meantime, let's go to the next step - defrost leftover cake.

When I bake I always have some leftover cake. Usually it is the top of the cake, which I remove to get the cake completely flat. What do you do with it? Please don't say you throw it out. OK it is partially acceptable if you eat it, but if you bake a lot, these leftover tend to pile up. Regardless of the amount, I just wrap it in plastic wrap and store it in the freezer and then use it later to make cake pops. So ... defrost the cake, crumble it into small pieces and add some mascarpone cheese or melted chocolate. The amount of extra ingredients to add varies depending on the cake I use, some are a bit dryer and may need more, some are more moist and may need less; I just go by my feeling. Mix everything together, I just use my hands and squish the mix until it kind of resembles modelling clay.
Print out a photo or a sketch of what you are modelling, just make it as big as your model. This way it is a great reference for proportions and final look. And let the modelling begin ...


At this point, a warning ... learn from my mistakes. The lion face was kind of heavy in the end and it sagged the cake on one end, when I put it on top. The cake luckily didn't collapse or fall apart and in the end all was well. Even better, because of the sagging the muzzle sat more low on the cake and the proportions were more realistic this way. Nevertheless, think about one of the following preventative measures:

1. leave the cake to sit a couple of hours in the fridge, even better over night; I was in a hurry and I decorated my cake immediately after assembling it. 

2. use support; model the face on a cardboard and support it with straws; basically like assembling a tiered cake.

I frosted the cake in a thin first layer of ganache, only the snout and the eyes are fondant. The mane is dark ganache, piped with the grass tip (tip # 133). Because the head is so irregular in shape, it was harder to smooth out the ganache, but I managed and then put another layer of ganache with a brush. Because I used a brush, the ganache seemed more fur like.


And the reaction? He cried. No, not from excitement or joy. Apparently this little monster was too realistic for a 3-year old and he needed a minute to calm down. I think it helped that his older brother started picking of the chocolate mane :) In the end I was happy with how the cake looked and I made it up to the little guy with the next cake (link soon, check back soon!).


Pinterest is way too addictive. There were countless times where I lost an extra hour of sleep just because I could't stop browsing through all the images. Although this pin doesn't seem particularly special at first glance, the description promises magic and truly there is magic in this dessert :)

For a 20 cm x 20 cm pan; 9 - 16 squares
4 eggs
150 g sugar
1 vanilla bean
125 g butter
115 g flour
500 ml milk

confectioners sugar for decorating

Separate the eggs and best the egg whites into a stiff meringue. Whisk together the egg yolks and sugar until the mixture has significantly risen and has gone really pale. Cut the butter into cubes and melt it. Add it to the egg yolk mixture along with the vanilla seeds. Whisk for about a minute.


Sdd the flour and mix just enough that there is no flour left in the bowl. Add the milk one quarter at a time and mix thoroughly after each addition so that the mixture gradually dilutes.


If you would add all the milk at the same time you could be left with lumpy batter. The batter will be quite thin, more like crepes batter or even more.


Add the meringue and mix well, but don't worry if you get a couple of larger leftover meringue pieces. Pour the batter into a greased pan.


Bake at 160° C; baking time may vary from 40 - 50 minutes depending on your oven. After this time check if the top is golden brown and if the batter is firm yet. If it is still kind of jiggly if you gently shake the pan, increase the baking time for 10 minutes and check again. Increase baking time again if needed. If the top is getting too brown, cover with tin foil so that it doesn't burn.


Once fully baked, take the squares out of the oven and let it come to room temperature, then refrigerate to cool completely. Once still in the pan, cut it into squares and use a spatula to scoop it out of the pan.

The result is truly amazing. During baking the batter separates into 3 layers. At the top is a fluffy sponge, the middle layer is like pudding and at the bottom you get a fudge like dense and compact layer.


I was spending vacation with my family in the Croatian Istrian coast and my evenings looked liked this for the past weeks.


I guess it shouldn't come as a surprise that with this kind of view every day, I had lavender on my mind non stop. My brain just would not stop figuring out what I could do with this and how to use it in the kitchen. I knew lavender was edible, but it still took some research to determine what I could and could not do. The first thing I discovered was that there is such a thing as culinary lavender. Well actually that was the second thing I discovered ... just after I browsed through tons of lavender recipes. You know just like that Alanis song ... isn't it ironic ... Baaaaah, now what?!? I have no idea what kind of lavender we have planted here.

Culinary lavender is actually a specific lavender variety, for those more horticulturally knowledgeable, this is usually a type called Lavandula angustifolia. To my delight and relief I then discovered that this is actually the type most suited for cooking, while others may be less suitable, but they wouldn't really kill you or cost you a trip to the hospital. So at this point this post deserves an American style disclaimer. Use culinary lavender, unless you are more on the adventurous side.

In the end our lavender did just fine and no stomachs were upset in the making of this delicious dessert. It is also true that only a small amount should be used in cooking and please don't be tempted to use more, unless you like your dessert tasting like soap (or so I have read).


For 10 panna cottas:

500 ml cream
1 pack vanilla sugar or vanilla pod
50 g brown sugar
1 tsp lavender blossoms
1 pack gelatin powder
couple of tablespoons of water

60 g agave syrup
1 tsp lemon juice
1/2 tsp lavender blooms


Mix cream with vanilla sugar and brown sugar and heat until boiling. Remove from heat and add lavender blossoms.


Leave to stand for 15 minutes. It is best to test the intensity of lavender flavour, since it is likely that not all lavender has the same intensity and you may have to remove them sooner or let them infuse a little longer. In the meantime mix gelatin with water and let it bloom. Then melt it, remove the blossoms from the cream and stir in the gelatin. Soak the moulds in cold water, then pour in the cream and let the panna cottas seat in the fridge for at least 4 hours, 6 hours is even better.

I made some agave dressing to accompany my panna cottas and it worked really well with the lavender. Mix agave syrup and lemon juice in a small pot and let it boil for a few minutes so that it thickens a little. Remove from heat, add lavender blossoms and leave for 15 minutes the same as with the panna cotta, then remove the blossoms.

You can freely adjust the amount of agave syrup and lemon juice to your taste, but these amounts are tested and best in my opinion. You can buy agave syrup in most supermarkets here, but you could also substitute agave with honey.


If you are working with silicone moulds, just gently pull the edge of the mould so that it separates from the panna cotta and do this all around the mould. The panna cotta should slide out of the mould onto your plate.

With hard mould try to flip the mould on your plate and tap the bottom of the mould and the panna cotta may slide out. If this doesn't work, run your knife along the rim of the mould and then flip it. 

Gently drizzle the agave dressing over the panna cotta, rather less than more and later increase the amount if you feel it is not strong enough. Otherwise you may overpower the gentle lavander taste. Decorate with a few lavender blossoms.


This was one of the my first posts on my original blog, but given that it took so long to set up the English blog, bear with me and the bad photos (old camera :/ ) and homemade marshmallow fondant, where the seams just wouldn't blend in and I was only using it 'cause I thought it was cheaper (really wasn't).

I made this Winnie the Pooh as a tribute to my first ever fondant figurine and also fondant cake, now more than  4 years ago. The cake was frosted with melted chocolate (almost impossible to cut through later), uneven, badly covered with marshmallow fondant, the cracks were covered with circle cutouts, but the fondant Pooh turned out really good. And if I could make it on my first attempt, I am sure anybody can..

Start with some yellow fondant, shaping it into ball. Press the bottom part into the surface just a bit to get the ball a little wider at the bottom, but not too much, because the fondant will naturally settle into the surface on it own, before it starts drying and keeping its shape. The wider part will be Pooh's tummy sticking out underneath his shirt. Stick a toothpick in for support.


Roll out an even strip of red fondant the same width as the top half of the body.


Cut out an opening in the middle of the strip for his collar. Remove the cutout and roll down top part of the strip.


Roll the fondant strip around Pooh's body with the collar in front. Press together where both ends of the strips meet and cut away the leftover part. Blend in the seam. 


Continue with the legs, rolling out two balls of yellow fondant into two rolls. Use a knife and cut halfway into the end of the roll and bend the end upwards so that a foot forms.


Attach both legs to the body with a drop of water.


Take another two balls of yellow fondant and also shape them into rolls, this time a bit shorter than for the legs. Shape a wrist by pressing down lightly with you finger at about a third of the length of the roll and rolling gently back and forth.


Dress around a third of the arm into red fondant the same way we dressed the body to make the sleeve.


Use small scissors or a knife to cut into the hand to form a thumb.


Attach both arms to the body the same way as the legs with a drop of water.


Lastly form the head. Shape most of the leftover yellow fondant (leave two small balls for later) into a egg like shape like below.


Lay the head on a surface and press on the narrower part to flatten it a bit.


Use your fingers to squeeze the wider part into a tip.


Take the two saved yellow fondant balls and flatten them using a round fondant tool to form two ears and stick them to the head using a small amount of water. Take some black fondant and shape a round-ish triangle for the nose. Add the eyes and the brows. Use a knife and make an incision for the mouth.


Place the head on the body and stick it on with a bit of water.


If you want, treat Pooh to some hunny :)